Hi my dears,
do you like fuzzy yarn? Are you using it in your projects, or are you afraid of making with this yarn? The working with a fuzzy yarn could be a challenge, I know it. But I think, that the project made of fuzzy yarn are so pretty and chunky and soft, that it deserves to not give up and accept this challenge, right! :-)
There is a plenty type of fuzzy yarns on the market. The difference between these yarns is in the thickness and length of the fringes. They could be thin and long or thick and short, the could a have some sparkle. They could be combined with another thread e.g. pompons. I am using a mixture of pompom and eyelash yarn with long fringes for making the hair of my dolls and angles most of all and decoration.

For making the hats, sheep, and wreaths, I am using the yarn with thick and short fringe.
You could find really wide amount for different fuzzy/ shaggy/ eyelash yarns in the stores. Here are some examples of yarn I use or I have at home right now :-)
If I am creating something for children, I am always use certificated and tested yarn for products suitable for children. But I was very curious about the quality of the yarn from eBay (the green ball), so I bought some no name, no brand ball and used it but for our outdoor wreath. It looks very nice, I am satisfied with working with this yarn but as I wrote before, if I will make something for the children I will always use the tested, branded yarn.
I personally like to work with a fuzzy yarn. It needs the practice a little bit, but I think, that it is necessary to use it in some projects :-) And because I know, that sometimes, it could be hard to start to crocheting with fuzzy yarn, I would like to write and show you my tips and advice for working with it. I hope, you will find it useful :-)
- Choose the right yarn for your project
Before you will make some project, please take your time and search the right yarn for you. Make a little research. It will not need much time for that, but it is necessary. Read the description of the yarn properly, don't believe the pictures of the yarn itself only :-) Sometimes the yarn could look more fleecy on the pictures, then it is in the presence. Search for the pictures of the finished projects on the internet. It will give you a great overview, how the yarn looks. At home, I have so many yarns, which looks beautiful on the pictures and in balls, but not when they are processed. The final projects looked not nice. Sometimes by crocheting with a fuzzy yarn, it could be difficult to see the stitches. The visibility of the stitches depends on the colors also. If you will work with darker colors, the visibility of the stitches could me more difficult. So think about the colors you will use also.

I will write about fuzzy yarns with a short and thick density of the fringes today.

- Test the yarn and make the sample
I know that feeling, you have an idea, you have yarn and you would like to make your projects immediately. But I recommend to you take a little time and make a sampler. Choose the right hook size just for you. Sometimes, there is a recommendation for using the hook on the yarn's tape. But as you know, every crocheter is unique and sometimes you have to change the hook to work will go better. For work with a fuzzy yarn, it is recommended to use the bigger hook, about 4,5-8 mm wide hook.
I will write you my own experience: I like to work with Happy yarn by Yarnart. It has some glittering, it looks so nice at the sun. There is a recommendation of using 8 mm wide hook. It is so huge for me, even I make a hat or crochet the sheep, I am using a hook 4,5 mm wide and it is great for my style of crocheting. So not always, the recommendation on the tape could fit your own style of crocheting. You should adjust the size hook according to your style of crocheting and the crocheted project also.
Upper picture: Happy yarn by YarnArt, hook 4,5 mm/ US 7
Lower picture: Happy yarn by YarnArt, hook 8 mm
As you see the difference is really huge. I will probably use the hook 8 mm if I will make some clothes, but for my hats and decoration are the stitches too big. For the hat, I would probably use hook 5 mm, for amigurumi 4,5 mm and for some airy sweather hook 8 mm. So always it is needed to realize what project you will make before you will start crocheting. But generally, it is recommended to work with a bigger hook by crocheting with a fuzzy yarn. If the stitches will be too tight, it will be very difficult to work with them.
- Practice
So, you have a yarn and right hook, you made a sampler and you could begin of crocheting of your project - Tra Lala Tra Lala :-)
- Focus on the chain strand
The crocheting with fuzzy yarn could be hard because sometimes it is difficult to see the stitches. If you take a closer look at your yarn, it consists of the chain strand and the fringes. By crocheting try to focus on the chain strand. The visibility of strand is varied on used material, as you see on the picture below. But always you could see these two parts (chain strand and fringes).
Upper thread is Happy yarn by YarnArt, lower thread is Pipsqueak yarn by Bernat.
- Feel the next stitch
What I mean with this? Before you will insert a hook in next stitch, take your thumb and middle finger and feel the stitch between these fingers and after then insert a hook. From my point of view, this is the most important sentence of the whole post. You will need not only your eyes, but you will need also the sense of touch by crocheting with a fuzzy yarn :-) As you see in the picture below I keep next stitch between my fingers right next to the stitch marker. Crochet slowly, with relaxed hands and good light :-)
- Working in the rounds
When you will crochet in the rounds, I will recommend working in spiral circle rounds, it means, that you will not turn the work after every round, you crochet continuously.
- Use the stitch marker
Obviously, I am not using any stitch markers. Because if you work with a smooth yarn, you could always easily see the stitches and rounds and count them if needed. But working with the fuzzy yarn is not this case. So I am using the stitch marker, or short piece of contrast yarn, to I could see the beginning of the round. It is very important. And do you know, what is great for working with a fuzzy yarn? If you will make a mistake in the total amount of the stitches - it is not visible :-) So no drama. You could easily fix it in next round :-) But I recommend to count the stitches of every single round.
- Work SC in back loops of the stitches
If you will work in back loops of the stitches, the rounds will be more defined. The fringes will stay outside and this will be the right side of your project and the structure of the project will look more compacted. I used my favorite Kacenka yarn and hook 3 mm for the sample, to it will be more visible.
You will crochet SC as common but you will work into in back loops only, insert a hook from middle to back of the loop and crochet SC as common.
And now crocheting with a fuzzy yarn.
- Crochet between stitches
Double crochet example
I don't know if you make it by the way as me, but most of all when I am crocheting DC I insert a hook under both loops of the next stitch. I used my favorite Kacenka yarn and hook 3 mm for the sample.

When I am crocheting with a fuzzy yarn, I insert a hook between the stitches under the loops. The stitches are better to see and the separation of the stitches is more visible. I am using this technique when I am crocheting the hats from fuzzy yarn.

Fist picture: DC crocheted under the both loops
Second picture: DC crocheted between the stitches

- Count the rounds as you go
I love to crochet without patterns, not to count the stitches and rounds. But always it is possible when you make one single creation only. If you would like to make several same creations, the counting of the stitches and rounds is necessary. And especially by crocheting with a fuzzy yarn, because the rounds are difficult to see, I recommend to count and mark off every single round.
Well, my dears I am at the end of my long post and I really hope, that it will be useful for you. I wish you happy crocheting with a fuzzy yarn :-)
Hi my dears,
are you ready for welcoming the Spring? :-) I love the Spring very much, you know that and we will welcome it with colors this year. Do you search for some inspiration for your door's wreath? I have some for you. Just take some fuzzy yarn and some spring decoration and make the one with me :-)
I was in my favorite shop for flowers' designers and found some pretty little components for making the Spring decoration. I looove this shop. I would wander through this shop for hours :-)
If you would like to make this colorful spring wreath with me, just follow the instruction :-)
The Spring wreath tutorial
For our wreath I used:
• polystyrene wreath 27 cm in diameter /10,6 inches
• hook 5 mm / US 8/H
• fuzzy bulky yarn
• some pieces of fabric
• a little amount of toy filling
• small plastic eggs with loops for hanging 5 cm tall/1,96 inches
• wooden birds
• big flower button 7 cm in diameter/ 2,7 inches
• big flower button 7 cm in diameter/ 2,7 inches
• the plastic flowers
• some ribbons in bright colors 9 mm / 0,35 inches width
• the piece of green felt
• scissors
• sewing thread and common sewing needle
• the bast fibers
• the jute ribbon
• glue gun
• the bast fibers
• the jute ribbon
• glue gun
Well, the material is described and we could begin :-)
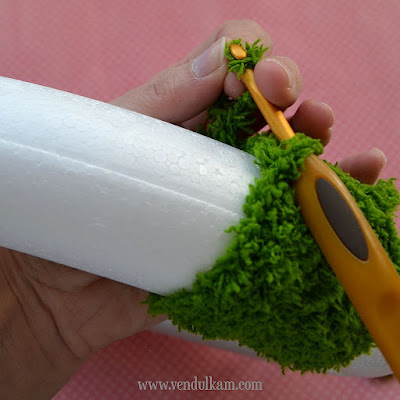
Take a polystyrene wreath and fuzzy bulky yarn. I use no brand yarn, I bought it from e-Bay, I was so curious to test it :-) I like that green color very much and like the texture. For decoration - it is great. But if I would make something for children I would always choose the tested brand yarn for sure. So take a yarn and hook 5 mm and crochet around the wreath. I always change the direction of the yarn to I will not tangle it.

I will take the yarn from up of the wreath and then make 1 SlSt
Then change the direction and take the yarn from the bottom of the wreath and make 1 SlSt.
Wrap the yarn around the wreath tight and thick. You could also wrap the yarn around the wreath without crocheting, but with making a SlSt is the yarn secured a little bit and I like it more. Make a loop for hanging with tightening of the ends of the yarn.
The main part of the wreath is finished and now you will decorate it. Follow your imagination or let me inspire you :-).


Well, we have to make the leaves first :-) Just take a piece of green felt. I choose dark and bright green piece of felt. Take the small piece and fold in half and cut the leaves as you see on the pictures. Make different sizes. Then take a leaf, fold it in half on one side and insert the needle there. Sew several leaves together and tight it. I used 9 leaves for each embellishment. I made two embellishments, one for each side of the big flower.


I made them already. I followed this great tutorial. They look really cute and are quick to make. You could use scraps of fabric, what is great. You could use them for many Spring decoration. If you would not make the carrots, you could easily sew some ribbons and add some bird component only. Use bast fibers in natural color and tight a bow and sew it next to the flower.
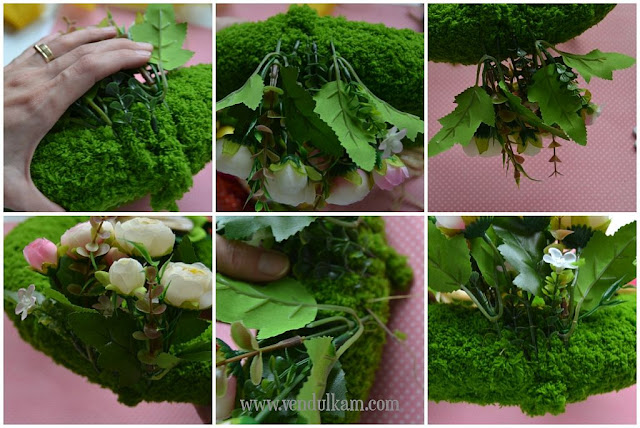
Use plastic flower and wrap the stems around the upper part of the wreath, under the fuzzy yarn. Shape them nicely, to the heads of the flower be oriented down. Sew the stems nicely. You could also use the glue gun, but I personally don't like to use it. I'll rather sew all, what I can :-)
Then make the jute bow. If you would like to make a nice bow, you could follow this tutorial.
Sew the jute bow above the plastic flowers. Sew it nicely. Sew three small plastic eggs on the wreath. Use the glue gun and glue the bird component above the eggs. The only case, I used glue gun :-)
Hi my dears,
as I promised, my new post is in Spring mood. I had to cheat a little because my own spring flowers are lazy a little bit, so I have to buy some beauties. But the promise was kept, right? :-)
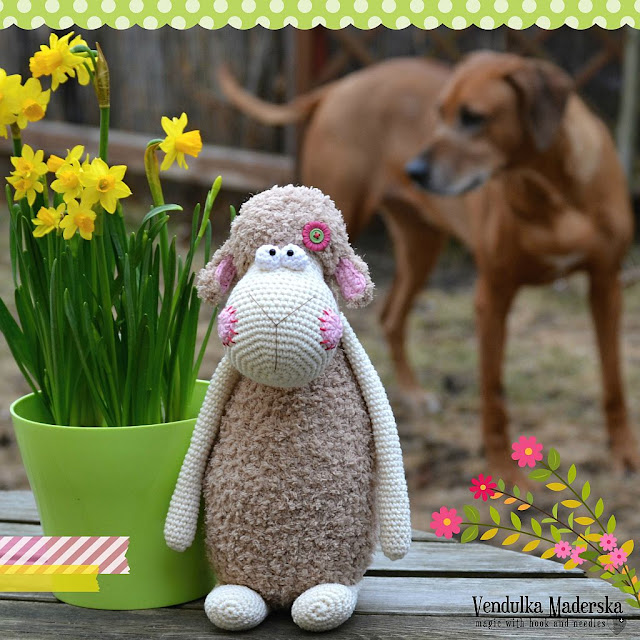
My new sheep would like to say: "Hello to you!"

She already made a friend with my best friend ♥

If you are interested, the pattern is testing already, as same as my Little Prince. Still, it is something on my hook. And what is on yours?
I wish you a happy start to the new week!
P.S. what are you saying of a new look of my blog? :-)
I wish you a happy start to the new week!
P.S. what are you saying of a new look of my blog? :-)
Hi my dears, it is the end of February, the ball season. And who suits the black suits most of all? To the penguin, of course :-) So I made one.


And because I think, that it is always a better to have a friend, I made the another one :-)

The pattern is ready in my patterns store
And my next post will be in Spring mood. Because I really miss the colors :-)


