Hi my dears,
are you ready for welcoming the Spring? :-) I love the Spring very much, you know that and we will welcome it with colors this year. Do you search for some inspiration for your door's wreath? I have some for you. Just take some fuzzy yarn and some spring decoration and make the one with me :-)
I was in my favorite shop for flowers' designers and found some pretty little components for making the Spring decoration. I looove this shop. I would wander through this shop for hours :-)
If you would like to make this colorful spring wreath with me, just follow the instruction :-)
The Spring wreath tutorial
For our wreath I used:
• polystyrene wreath 27 cm in diameter /10,6 inches
• hook 5 mm / US 8/H
• fuzzy bulky yarn
• some pieces of fabric
• a little amount of toy filling
• small plastic eggs with loops for hanging 5 cm tall/1,96 inches
• wooden birds
• big flower button 7 cm in diameter/ 2,7 inches
• big flower button 7 cm in diameter/ 2,7 inches
• the plastic flowers
• some ribbons in bright colors 9 mm / 0,35 inches width
• the piece of green felt
• scissors
• sewing thread and common sewing needle
• the bast fibers
• the jute ribbon
• glue gun
• the bast fibers
• the jute ribbon
• glue gun
Well, the material is described and we could begin :-)
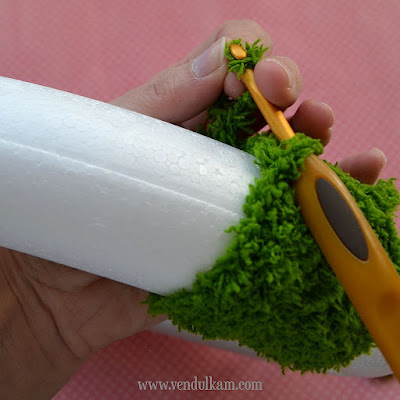
Take a polystyrene wreath and fuzzy bulky yarn. I use no brand yarn, I bought it from e-Bay, I was so curious to test it :-) I like that green color very much and like the texture. For decoration - it is great. But if I would make something for children I would always choose the tested brand yarn for sure. So take a yarn and hook 5 mm and crochet around the wreath. I always change the direction of the yarn to I will not tangle it.

I will take the yarn from up of the wreath and then make 1 SlSt
Then change the direction and take the yarn from the bottom of the wreath and make 1 SlSt.
Wrap the yarn around the wreath tight and thick. You could also wrap the yarn around the wreath without crocheting, but with making a SlSt is the yarn secured a little bit and I like it more. Make a loop for hanging with tightening of the ends of the yarn.
The main part of the wreath is finished and now you will decorate it. Follow your imagination or let me inspire you :-).


Well, we have to make the leaves first :-) Just take a piece of green felt. I choose dark and bright green piece of felt. Take the small piece and fold in half and cut the leaves as you see on the pictures. Make different sizes. Then take a leaf, fold it in half on one side and insert the needle there. Sew several leaves together and tight it. I used 9 leaves for each embellishment. I made two embellishments, one for each side of the big flower.


I made them already. I followed this great tutorial. They look really cute and are quick to make. You could use scraps of fabric, what is great. You could use them for many Spring decoration. If you would not make the carrots, you could easily sew some ribbons and add some bird component only. Use bast fibers in natural color and tight a bow and sew it next to the flower.
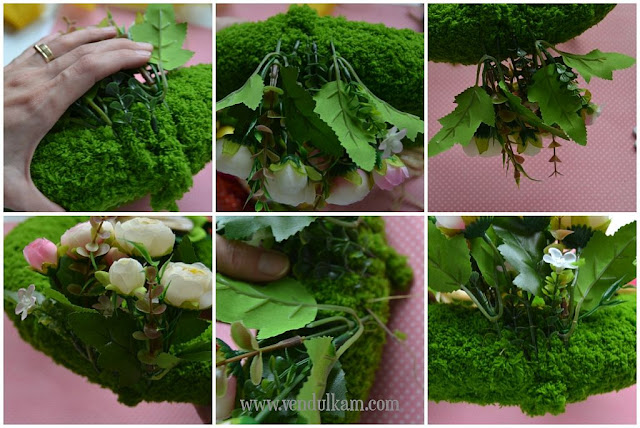
Use plastic flower and wrap the stems around the upper part of the wreath, under the fuzzy yarn. Shape them nicely, to the heads of the flower be oriented down. Sew the stems nicely. You could also use the glue gun, but I personally don't like to use it. I'll rather sew all, what I can :-)
Then make the jute bow. If you would like to make a nice bow, you could follow this tutorial.
Sew the jute bow above the plastic flowers. Sew it nicely. Sew three small plastic eggs on the wreath. Use the glue gun and glue the bird component above the eggs. The only case, I used glue gun :-)


